
KraftMaid crown molding adds elegance to kitchens, transforming cabinetry with a refined touch․ It complements kitchen designs, offering a flawless finish that enhances the room’s ambiance․
1․1 Overview of KraftMaid Crown Molding
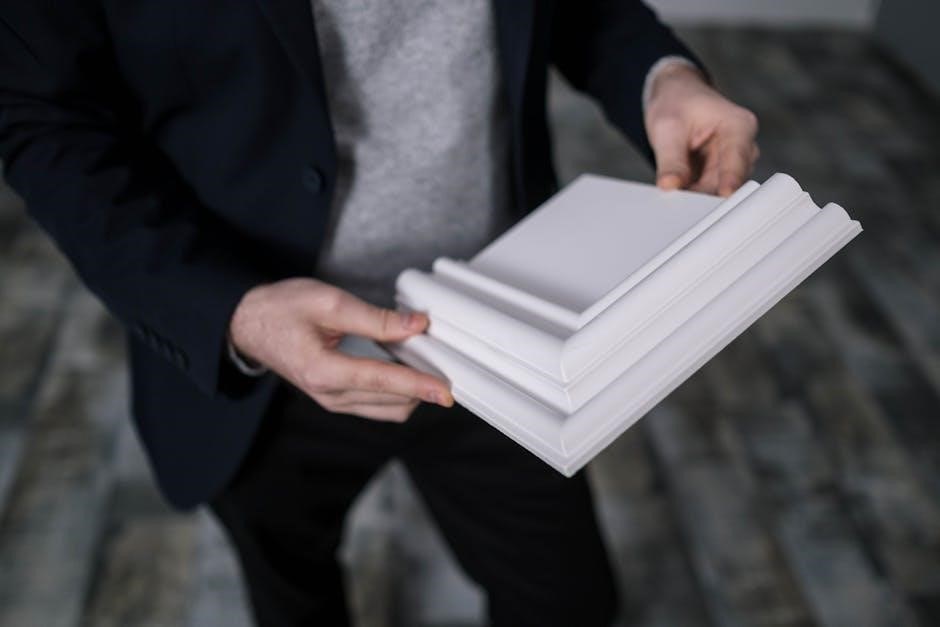
KraftMaid crown molding is a decorative element designed to enhance cabinetry aesthetics․ Available in various profiles and finishes, it offers a polished look that complements kitchen designs․ Crafted from durable materials, it is easy to install and customize․ The molding adds a sophisticated touch to cabinetry, bridging the gap between cabinets and ceilings․ Its versatility allows homeowners to match it with their kitchen style, creating a seamless and elegant appearance․ Proper installation ensures a professional finish, elevating the overall design․
1․2 Importance of Crown Molding in Kitchen Design
Crown molding is a vital design element that elevates kitchen aesthetics, adding a polished and refined appearance․ It bridges the gap between cabinets and ceilings, creating a cohesive look․ By complementing the kitchen’s style, crown molding enhances the overall ambiance, making the space feel more luxurious and well-designed․ Its strategic placement ensures a balanced and harmonious visual flow, contributing significantly to the kitchen’s modern or traditional appeal․
Planning and Preparation
Planning is crucial for successful crown molding installation․ Assess cabinet layout, measure spaces accurately, and prepare a delivery drop zone for cabinet shipments to ensure smooth progress․
2․1 Understanding Cabinet Types and Crown Molding Compatibility
Understanding cabinet types is vital for crown molding installation․ Full overlay, inset, and partial overlay cabinets require specific measurements and profiles․ KraftMaid crown molding is designed to complement various cabinet styles, ensuring a seamless fit․ Proper sizing and alignment are crucial to avoid gaps and misalignment․ Always consider the cabinet door style and spacing to achieve a polished, professional appearance․ This step ensures the molding enhances the overall kitchen aesthetic․
2․2 Measuring Cabinet Spaces for Crown Molding
Accurate measurement of cabinet spaces is crucial for proper crown molding installation․ Measure the length, width, and angles of each cabinet section․ Use a tape measure to ensure precise dimensions, accounting for any obstructions or uneven surfaces․ Double-check measurements to match the crown molding profile․ Proper alignment ensures a seamless fit, enhancing the kitchen’s aesthetic․ Each cabinet may vary, so measure individually for consistency and a polished finish․
2․3 Tools and Materials Needed for Installation
Installing KraftMaid crown molding requires specific tools and materials․ Essential tools include a tape measure, level, pencil, miter saw, coping saw or jig, clamps, and safety gear․ Materials needed are the crown molding pieces, wood glue, nails or screws, sandpaper, and filler for gaps․ Additional items like a stud finder and caulking gun can be helpful․ Gathering all necessary supplies ensures a smooth and successful installation process․
Measuring and Cutting Crown Molding
Accurate measurements and precise cuts are crucial for a seamless crown molding installation․ Use a miter saw for clean cuts and ensure angles align perfectly for professional results․
3․1 How to Measure Angles and Lengths for Crown Molding
Measuring angles and lengths accurately is critical for crown molding installation․ Use a combination square or angle finder to determine miter angles, ensuring precise cuts․ Measure the length of each cabinet edge, accounting for any obstructions․ Mark the molding with a pencil, aligning it with the cabinet’s edge․ Double-check measurements to avoid errors․ For complex angles, use a miter saw with a protractor guide; Always test cuts on scrap material first to ensure accuracy;
3․2 Cutting Techniques for Precise Miter Joints
For precise miter joints, use a miter saw to make clean, angled cuts․ Set the saw to the measured angle, ensuring the molding aligns with the blade․ Use a coping saw for intricate cuts․ Test cuts on scrap material first to perfect the angle․ Sand edges post-cutting for smoothness․ Apply a miter clamp to hold pieces steady during cutting․ Use a jig or guide for consistent results, especially for complex profiles or repeated cuts․
Installation Process
Begin by preparing cabinets and ensuring surfaces are clean and dry․ Attach crown molding using recommended adhesives and fasteners, aligning edges precisely for a seamless fit․
4․1 Preparing Cabinets for Crown Molding
Ensure cabinets are level and securely fastened to the wall․ Clean the surface thoroughly, removing dirt or grease․ Lightly sand edges for better adhesion; Check for obstructions like hardware or trim․ Align the crown molding with the cabinet tops, verifying measurements for a precise fit․ Remove any cabinet hardware to prevent interference․ Double-check the area is clear and ready for installation to achieve a smooth, professional result․
4․2 Attaching Crown Molding to Cabinets
4․3 Securing Crown Molding with Adhesives and Fasteners
Apply a thin layer of wood adhesive to the back of the crown molding for a strong bond․ Use a pneumatic nailer or screws to secure it firmly to the cabinets․ Start in the center and work outward to avoid air pockets․ Clamp the molding in place while the adhesive dries to ensure proper alignment․ Allow the adhesive to set fully, following the manufacturer’s instructions, before handling the cabinets․ This ensures a durable and long-lasting installation․
4․4 Handling Inside and Outside Miters
Inside miters are cut to fit snugly within corners, while outside miters extend outward for seamless transitions․ Use a miter saw to achieve precise 45-degree angles for both types of cuts․ Test-fit each piece before securing to ensure proper alignment․ Start with inside miters, gently tapping them into place, then proceed to outside miters, aligning them with the ceiling and adjacent surfaces․ Clamp both types during installation to maintain alignment and prevent gaps․
4․5 Final Alignment and Adjustments
Ensure all crown molding pieces fit precisely before final securing․ Check each joint and seam for proper alignment, using shims if necessary․ Gently sand any uneven areas and apply wood filler to small gaps․ Allow filler to dry, then sand smooth․ Conduct a final inspection, ensuring the molding aligns with the ceiling and cabinets․ Make minor adjustments as needed for a seamless look․ Patience and attention to detail are key for a polished finish․

Tips and Best Practices
Use a miter saw for clean cuts and ensure proper fit by measuring twice․ Apply wood glue and clamps for strong bonds, and fill gaps with caulk․
5․1 Ensuring Proper Fit and Alignment
For a seamless look, measure twice and cut once to ensure accuracy․ Use a miter saw for precise angled cuts and a coping saw for intricate shapes․ Test-fit the molding before securing it, and use a laser level to align pieces perfectly; Clamp the molding in place while attaching it to maintain stability and achieve a polished finish․
5․2 Using a Miter Saw for Clean Cuts
A miter saw is essential for achieving precise, clean cuts in crown molding․ Ensure the saw is set to the correct angle and use a laser guide for accuracy․ Measure carefully and mark the molding before cutting․ Apply gentle, consistent pressure to avoid splintering․ For intricate cuts, consider using a coping saw․ Sand edges lightly after cutting to smooth any rough spots, ensuring a professional finish․
5․3 Managing Gaps and Imperfections
Gaps and imperfections in crown molding can be addressed using caulk or wood filler․ Apply caulk to small gaps between the molding and cabinets, ensuring a smooth finish․ For larger imperfections, sand the area and fill with wood filler, then paint or stain to match․ Use clamps to hold the molding in place while adhesives dry, minimizing movement․ Allow all repairs to dry completely before touching up with paint or stain for a seamless look․
Common Mistakes and Troubleshooting
Common mistakes include uneven surfaces, misaligned joints, and improper measurements․ Troubleshoot by using caulk for gaps and wood filler for imperfections, ensuring a polished finish․
6․1 Avoiding Uneven Surfaces and Misaligned Joints
To avoid uneven surfaces, ensure walls are level and plumb before installation․ Misaligned joints can be prevented by accurate measurements and proper miter cuts․ Sand surfaces smoothly and test-fit pieces before securing․ Use shims if necessary to align molding correctly․ Addressing gaps early with caulk or wood filler ensures a seamless finish․ Proper planning and precision cutting are key to avoiding these common installation pitfalls․
6․2 Fixing Gaps and Securing Loose Molding
Gaps in crown molding can be filled with wood filler or caulk, ensuring a seamless look․ Sand the area smooth after filling․ For loose molding, reassess the fastening points and use additional adhesive or nails․ Tighten any loose joints and ensure proper alignment․ Applying even pressure and allowing adhesives to set fully helps secure the molding firmly․ Regular inspections and timely adjustments prevent further issues and maintain the molding’s stability and appearance․
Maintenance and Upkeep
Regularly clean crown molding with a soft cloth and mild detergent to preserve its finish․ Touch up scratches and inspect for damage to maintain its elegance․
7․1 Cleaning and Preserving Crown Molding
Regular cleaning is essential to maintain the beauty of KraftMaid crown molding․ Use a soft, lint-free cloth and a mild detergent solution to gently wipe away dust and grime․ Avoid harsh chemicals or abrasive cleaners, as they may damage the finish․ For stubborn stains, lightly dampen the cloth but ensure the molding is dry afterward to prevent water spots․ Regular polishing with a wood-specific cleaner can enhance the appearance and protect the surface․ Inspect for damage periodically and address scratches or dents promptly to preserve the molding’s integrity․
7․2 Repairing Damaged Crown Molding
Repairing damaged KraftMaid crown molding requires careful attention to detail․ Start by assessing the damage—fill small gaps or dents with wood filler and sand smooth․ For loose sections, reattach using wood adhesive and clamps․ Touch up scratches or discoloration with paint or stain that matches the original finish․ For more extensive damage, replace the affected piece entirely․ Regular inspections and prompt repairs will maintain the molding’s appearance and structural integrity over time․
Design and Style Considerations
KraftMaid crown molding offers various profiles to match kitchen styles, from classic to modern․ Choose a design that complements cabinetry and enhances the room’s aesthetic appeal․
8․1 Choosing the Right Crown Molding Profile
Selecting the ideal KraftMaid crown molding profile involves matching it with your kitchen’s style and cabinetry․ Consider classic, ogee, or ornate designs to complement traditional or modern aesthetics․ Measure the cabinet height and desired molding thickness to ensure proportionality․ Personalize the look by layering profiles for a customized appearance․ Ensure the chosen design aligns with your kitchen’s theme, enhancing visual harmony and sophistication․ This step is crucial for achieving a polished, professional finish․
8․2 Matching Crown Molding with Cabinet Style
Matching crown molding with your cabinet style ensures a cohesive kitchen design․ Consider the cabinet material, color, and door style when selecting molding․ For inset cabinets, opt for slim profiles, while full-overlay cabinets can handle more ornate designs․ Test samples against cabinet finishes to ensure harmony․ Ensure the molding complements the cabinet’s aesthetic, creating a seamless transition that enhances the overall kitchen appearance while maintaining proportion and balance․

Hardware and Adjustments
Selecting the right hardware is crucial for secure crown molding installation․ Adjust cabinet hinges and handles to accommodate molding thickness, ensuring proper door clearance and alignment․
9․1 Adjusting Cabinet Hardware for Crown Molding
Adjusting cabinet hardware is essential for a seamless crown molding installation․ Measure the molding’s thickness to determine how much to recess hinges and handles․ Ensure proper clearance by spacing hardware 1-2 inches from the molding’s edge․ Reposition or replace hinges if necessary to prevent door misalignment․ Additionally, check handle placement to maintain functionality and aesthetic balance․ Precise adjustments ensure doors open smoothly and the molding integrates flawlessly with the cabinet design․
9․2 Ensuring Proper Clearance and Fit
Ensuring proper clearance and fit is critical for a professional crown molding installation․ Measure the space between the molding and cabinets to avoid obstructions․ Use a tape measure to verify vertical and horizontal alignments․ Test fit the molding before securing it to ensure it sits evenly․ Adjust the molding as needed to account for any uneven surfaces or gaps․ Proper clearance prevents interference with cabinet doors and ensures a smooth, polished appearance․
Safety Considerations
Always wear safety goggles and gloves when cutting or handling crown molding․ Ensure proper ventilation when using adhesives or paints․ Keep power tools like miter saws and sanders away from children․ Maintain a clean workspace to prevent tripping hazards․ Use ladders safely and avoid overreaching․ Follow manufacturer guidelines for all tools and materials to minimize risks during installation․
10․1 Safety Tips for Handling Power Tools
Always wear safety goggles and a dust mask when operating power tools like miter saws or sanders․ Ensure tools are properly plugged in and cords are free from damage․ Maintain a firm grip and keep loose clothing tied back to avoid accidents․ Never reach over moving blades or cut materials under stress․ Regularly inspect tools for sharpness and alignment․ Keep children and pets away from the workspace․ Store tools securely after use to prevent unauthorized access․
10;2 Preventing Accidents During Installation
Ensure proper ladder safety by maintaining three points of contact and having a helper stabilize the ladder․ Clear the workspace of debris to prevent tripping hazards․ Keep power tools well-maintained and avoid using damaged equipment․ Never overreach while cutting or installing crown molding․ Use clamps to secure materials firmly before cutting․ Avoid distractions and maintain focus during the installation process to minimize errors and potential injuries․

Professional Assistance
Consult professionals for complex crown molding installations to ensure precision and safety․ They handle intricate designs and provide expert advice, ensuring a flawless finish and proper installation․
11;1 When to Hire a Professional Installer
Hire a professional installer for complex KraftMaid crown molding projects, especially when dealing with intricate designs or large spaces․ Professionals ensure precise measurements, flawless fits, and handle tricky cuts with expertise․ They offer valuable design guidance and adhere to safety protocols, minimizing risks․ Their experience guarantees a polished finish, making the investment worthwhile for achieving a sophisticated kitchen aesthetic․
11․2 Finding Reliable Contractors for Crown Molding
To find reliable contractors for KraftMaid crown molding, research local professionals with experience in cabinetry and molding installations․ Check reviews, ask for portfolios, and ensure they have expertise in handling KraftMaid products․ Verify their credentials and request references to ensure quality workmanship․ Comparing quotes and services can also help in selecting the best fit for your project, ensuring a seamless and professional installation process․

Additional Resources
Explore recommended tools, online tutorials, and guides for KraftMaid crown molding installation․ Check out the Kreg crown mould jig and other resources for a successful DIY project․
12․1 Recommended Tools for Crown Molding Installation
For a successful KraftMaid crown molding installation, essential tools include a miter saw, coping saw, tape measure, nail gun, and clamps․ A Kreg crown mould jig ensures precise cuts, while a laser level aids in alignment․ Safety gear like gloves and goggles is crucial․ Additional tools like sandpaper, caulk, and a utility knife help achieve a polished finish․ Having these tools on hand ensures accuracy and efficiency during the installation process․
12․2 Online Tutorials and Guides for DIY Enthusiasts
Online tutorials and guides provide step-by-step instructions for installing KraftMaid crown molding․ Videos demonstrate cutting techniques, miter joints, and alignment tips․ Detailed blogs offer advice on measuring, tool setup, and troubleshooting common mistakes․ The KraftMaid website features a comprehensive guide, while YouTube channels share beginner-friendly installation methods․ These resources empower DIY enthusiasts to achieve professional-looking results with confidence and precision․

FAQs
FAQs address common questions about KraftMaid crown molding, such as ensuring proper fit, measuring accurately, and using the right tools for installation success․
13․1 Common Questions About KraftMaid Crown Molding
Common questions about KraftMaid crown molding include inquiries about proper measurement techniques, tools needed for installation, and tips for achieving precise miter joints․ Many homeowners also ask about compatibility with different cabinet styles and how to handle gaps or imperfections during installation․ Additionally, questions arise about the best materials for securing the molding and ensuring a seamless fit with existing kitchen designs․ These FAQs provide clarity for DIY enthusiasts and professionals alike, addressing installation challenges and offering practical solutions․
13․2 Addressing Concerns About Installation Challenges
Common installation challenges include uneven surfaces, misaligned joints, and gaps between the molding and cabinets․ To address these, ensure proper measurement and use a miter saw for clean cuts․ Applying the right adhesives and fasteners can prevent loose molding․ For complex setups, consulting a professional or following detailed tutorials can help overcome difficulties․ Proper preparation and alignment are key to achieving a seamless, professional-looking finish․
KraftMaid crown molding elevates kitchen aesthetics, offering a refined finish․ Proper installation ensures a professional look, transforming spaces with elegance and sophistication, perfect for DIY enthusiasts․
14․1 Final Thoughts on KraftMaid Crown Molding Installation
KraftMaid crown molding installation is a rewarding project that enhances kitchen aesthetics․ Proper measurement, precise cutting, and careful alignment are key to achieving a professional finish․ While DIY enthusiasts can succeed with patience and the right tools, professional assistance is recommended for complex layouts․ Avoid common mistakes like uneven surfaces and misaligned joints for a polished look․ With attention to detail, KraftMaid crown molding can elevate your kitchen design, offering long-lasting elegance and sophistication․
14․2 Encouragement for DIY Projects
Embarking on a DIY KraftMaid crown molding project can be incredibly rewarding․ It allows homeowners to personalize their kitchen design while gaining valuable skills․ With patience and proper planning, even beginners can achieve professional-looking results․ The sense of accomplishment from transforming your space is unparalleled․ Don’t hesitate to take on this project—it’s a great way to enhance your kitchen’s elegance while saving on labor costs․ Your effort will result in a beautiful, lasting outcome․