
Welcome to the ultimate guide on heat transfer vinyl (HTV) hoodie logo placement! This cheat sheet covers proper placement techniques, symmetry, alignment, and size guidelines to ensure professional results.
Overview of Heat Transfer Vinyl (HTV)
Heat Transfer Vinyl (HTV) is a popular method for customizing apparel, including hoodies. It involves cutting designs from heat-activated vinyl and transferring them onto fabric using heat and pressure. HTV is versatile, suitable for various fabrics, and offers durable, long-lasting results. Proper heat press settings are crucial for a successful application. Design considerations, such as size and alignment, ensure a professional finish. HTV is ideal for both beginners and experienced crafters, making it a cost-effective solution for creating custom designs. With a wide range of finishes available, HTV allows for creative and personalized hoodie logo placements.
Importance of Proper Logo Placement
Proper logo placement on hoodies is essential for both aesthetics and functionality. A well-positioned design enhances visibility, ensuring your brand or artwork stands out. Misaligned or poorly placed logos can appear unprofessional, detracting from the overall appeal; Symmetry and alignment are key; logos should be placed to avoid distortion and maintain readability. For instance, front chest logos are typically centered and sized between 10-12 inches for optimal impact. Back placements should be aligned vertically to avoid following pant lines. Strategic placement also considers the hoodie’s features, such as the hood seam or pockets, to create a balanced look. Correct placement ensures durability, as improper positioning may lead to peeling or wear.

Materials and Tools Needed for HTV Placement
Essential materials include heat transfer vinyl, a heat press, cutting tools, and thermal tape. Measuring devices ensure accurate placement, while craft cutters and weeding tools prepare designs efficiently.
Heat Transfer Vinyl Types
Heat transfer vinyl (HTV) comes in various types, each suited for specific designs and fabrics. Glossy HTV offers vibrant colors and a smooth finish, ideal for bold logos. Matte HTV provides a subdued, non-reflective appearance, perfect for minimalist designs. Metallic and glitter HTV add a luxurious touch, great for eye-catching graphics. Reflective HTV is designed for high-visibility applications, such as safety gear or sportswear. Each type has unique transfer temperatures and pressing times, so it’s essential to follow manufacturer guidelines for optimal results. Choosing the right HTV ensures durability, color retention, and a professional finish on your hoodie designs.
Essential Tools: Heat Press, Cutting Tools, and Measuring Devices

A heat press is the cornerstone of HTV application, ensuring proper adhesion and durability. Choose a press that suits your project size, with adjustable temperature and pressure settings. Cutting tools like craft cutters or vinyl knives are vital for precise cuts, while weeding tools help remove excess vinyl. Measuring devices, such as rulers or alignment grids, ensure accurate logo placement. Thermal tape can secure designs during pressing, preventing misalignment. These tools collectively streamline the process, enabling professional-grade results. Investing in quality equipment guarantees crisp, long-lasting designs on hoodies.
Popular Hoodie Logo Placement Locations
Popular hoodie logo placements include the front chest, back, sleeves, hood, and pocket. These locations offer visibility, style, and practicality for custom designs.
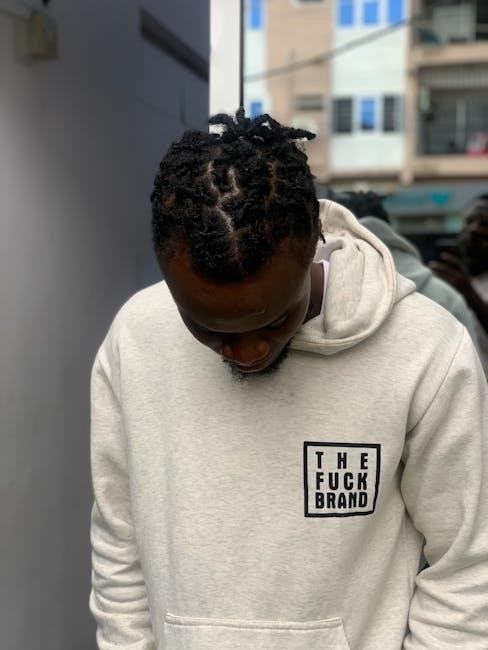
Front Chest Placement: Classic and Centered
The front chest placement is a timeless and popular choice for hoodie logos, offering a clean, professional look. Ideally, the logo should be centered and positioned 3-4 inches below the neckline for optimal visibility. The size should range between 10-12 inches wide to ensure it doesn’t overwhelm the garment. This placement is perfect for bold designs, as it draws immediate attention while maintaining balance. Proper alignment is crucial—ensure the logo is symmetrically centered to avoid a crooked appearance. This classic positioning works well for both casual and formal designs, making it a versatile option for various styles and branding needs. It’s a go-to choice for achieving a polished, professional finish.
Left Chest Placement: Subtle and Professional
Left chest placement offers a subtle yet professional look, making it ideal for minimalist designs. Typically, the logo is placed 5-6 inches from the left shoulder and 2-3 inches above the heart. This placement is similar to how logos are positioned on polo shirts, providing a clean and understated appearance. The size should be smaller than the front chest logo, usually around 8-10 inches wide, to avoid overwhelming the garment. This placement is perfect for brands seeking a discreet yet noticeable presence. It works well for both casual and professional settings, offering versatility for various design styles. Proper alignment is key to maintaining a polished look, ensuring the logo is straight and evenly spaced for a cohesive finish.
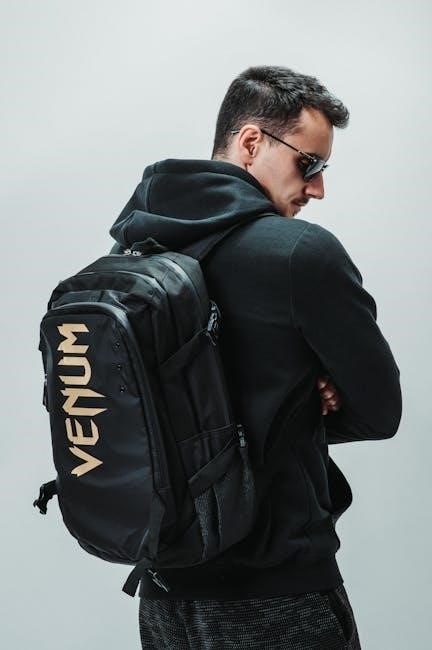
Back Placement: Bold and Eye-Catching
Back placement is ideal for making a bold statement with your logo. It offers a large canvas, allowing for bigger and more detailed designs. The logo should be centered horizontally and positioned 5-6 inches below the hood seam for optimal symmetry. This placement works well for names, numbers, or intricate graphics, creating a striking visual impact. The size can range from 12-14 inches in height, depending on the design, but ensure it doesn’t overwhelm the garment. Proper alignment is crucial, as a crooked logo can detract from the professional appearance. For added visibility, use contrasting colors against the hoodie’s fabric. This placement is perfect for athletic teams, events, or brands seeking maximum visibility and a modern aesthetic. It’s a popular choice for its eye-catching appeal and versatility in design;
Sleeve Placement: Modern and Stylish
Sleeve placement adds a modern and stylish touch to your hoodie design. It’s perfect for smaller logos or complementary graphics that enhance the overall look. Position the logo on the upper arm area, about 3-5 inches below the shoulder seam, for maximum visibility. The size should be proportionate to the sleeve, typically ranging from 6-8 inches in width. Vertical alignment is key to ensure the logo is readable and visually appealing. This placement is ideal for subtle branding or secondary designs, making it a great option for sports teams, casual wear, or artistic expressions. It’s a trending choice for those seeking a contemporary aesthetic without overwhelming the garment. Proper alignment and sizing ensure a professional finish, making sleeve placement a versatile and fashionable option.
Hood Placement: Unique and Creative
Hood placement offers a unique and creative way to showcase your logo. Position the design 5 inches below the hood seam for optimal visibility and symmetry. This placement is ideal for bold, eye-catching designs or complementary graphics that add a personal touch. The logo size should be proportionate to the hood, typically ranging from 8-10 inches wide. Vertical and horizontal alignment is crucial to maintain a polished look. Hood placement is perfect for statement pieces or intricate designs that stand out. It’s a great way to add a creative twist while keeping the overall design balanced. Use this space for bold typography or vibrant colors to make your hoodie truly distinctive. Proper alignment ensures the logo remains the focal point, creating a striking visual effect.
Pocket Placement: Minimalist and Chic
Pocket placement is a subtle yet stylish way to incorporate a logo, offering a minimalist and chic aesthetic. This placement is ideal for small, delicate designs that add a touch of sophistication without overwhelming the garment. The logo should be centered on the pocket, typically measuring 3-5 inches in width. This placement works well for simple typography or small graphics, ensuring the design remains understated yet impactful. Pocket placement is perfect for creating a clean, modern look while maintaining functionality. It’s a great option for those who prefer understated branding or want to add a discreet yet elegant detail to their hoodie. This placement is versatile and suits a variety of styles, from casual to professional designs.
Design Considerations for Hoodie Logos
When designing logos for hoodies, consider size, alignment, and color contrast to ensure visibility and appeal. Balance is key to creating a visually appealing and professional design.
Size Guidelines for Different Placement Areas
Proper sizing ensures logos look balanced and professional on hoodies. For front chest placement, logos should be 10-12 inches wide and positioned 3-4 inches below the neckline. Back logos can be larger, typically 12-15 inches wide, centered and placed 5 inches below the hood seam. Sleeve logos are smaller, around 3-5 inches tall, and should be positioned 5-6 inches above the cuff. Pocket logos are minimal, usually 4-6 inches wide, aligned with the pocket’s edge. Ensure symmetry and proportion by measuring the garment and considering the design’s complexity. These size guidelines help create visually appealing and well-placed logos on hoodies.
Alignment Tips: Vertical and Horizontal Symmetry
Proper alignment is key to achieving a professional look when placing logos on hoodies. For vertical symmetry, ensure the logo is centered and aligned with the garment’s midline. Measure from the center of the hoodie to maintain balance. For horizontal alignment, the logo should be level and straight, avoiding any tilt. Use a ruler or measuring tape to confirm the logo’s position relative to the neckline, hem, or other reference points. Fold the hoodie vertically to find the center point for accurate placement. Alignment grids or laser guides on heat presses can also aid in precise positioning. Always double-check alignment before pressing to avoid crooked designs and ensure the logo looks straight and symmetrical from all angles.
Importance of Symmetry in Logo Design
Symmetry plays a crucial role in creating balanced and visually appealing logo designs on hoodies. A symmetrical design ensures the logo looks professional and aligns seamlessly with the garment’s natural lines. Proper symmetry enhances readability and aesthetic appeal, making the logo stand out without appearing cluttered. For front chest and back placements, centering the design ensures it looks straight and evenly proportioned. Symmetry also helps maintain consistency across different logo sizes and placement locations, such as sleeves or pockets. By focusing on balanced proportions, symmetry ensures the logo complements the hoodie’s design, creating a polished and professional look that attracts attention for all the right reasons.
Color Contrast and Visibility on Different Fabrics
Color contrast and visibility are critical for ensuring logos stand out on hoodies. Choosing the right vinyl color that contrasts with the fabric ensures readability and visual appeal. For dark-colored hoodies, bright or metallic vinyl works best, while light-colored fabrics allow for a wider range of color options. High-contrast colors, such as black on white or white on black, are ideal for maximum visibility. Additionally, fabric type affects color perception; textured or thick fabrics may require more vibrant colors to maintain clarity. Proper alignment and smooth application further enhance visibility, preventing distortion. Always test colors on fabric samples to ensure the desired effect, especially for intricate designs or multi-color logos. This step ensures the final design looks professional and eye-catching on any hoodie style or color. Strategic color choices elevate the overall aesthetic, making the logo a standout feature of the garment.

Application Tips for Heat Transfer Vinyl
Preheat fabric, align designs precisely, and apply even pressure with a heat press. Follow HTV instructions for temperature and time. Test multi-color layering and timing for best results.
Preparation Steps Before Applying HTV
Proper preparation is key to achieving a professional finish. Start by washing and drying the hoodie to remove any finishes that might interfere with adhesion. Lay the garment flat on a heat-resistant surface, ensuring it is smooth and wrinkle-free. Preheat the heat press to the recommended temperature for your specific HTV. Cut the vinyl design precisely, leaving a small border around the edges for easy weeding. Use thermal tape to secure the design in place, ensuring it is centered and aligned properly. Double-check the placement against a sizing chart to confirm the logo fits the intended area. Finally, cover the design with a heat-resistant sheet to protect the fabric during pressing. Proper preparation ensures a crisp, long-lasting transfer.
Aligning the Logo: Centering and Positioning
Accurate alignment is crucial for a polished look. Measure the hoodie’s chest area, typically 3-4 inches below the neckline for front logos. Use a ruler or measuring tape to mark the center vertically and horizontally. Secure the vinyl with thermal tape to prevent shifting during pressing. For symmetry, ensure the logo aligns with the garment’s natural lines, such as the center of the chest or back. Double-check the placement by visually inspecting from multiple angles. For sleeves, position the logo 2-3 inches above the cuff for a balanced appearance. Proper alignment ensures the design looks intentional and professional, enhancing the overall aesthetic of the hoodie.
Heat Press Settings and Techniques
For optimal results, set your heat press to 300-320°F (149-160°C) with medium to high pressure. Preheat the hoodie for 2-3 minutes to remove moisture and ensure proper vinyl adhesion. Place the logo centered on the preheated area, secure it with thermal tape, and press for 12-15 seconds. Avoid over-pressing, as it can damage the vinyl or fabric. Use a thermometer to verify temperature accuracy. Always follow the specific HTV manufacturer’s instructions for precise settings. Proper technique ensures a durable, long-lasting finish. Never open the press mid-cycle, as this can cause peeling or misalignment. Adjust settings slightly if working with thicker fabrics like fleece. Achieve professional-quality results by adhering to these guidelines.
Multi-Color Designs: Layering and Timing
For multi-color designs, proper layering and timing are essential. Start with the darkest color to prevent bleeding or visibility of underlying layers. Apply each color separately, aligning carefully before pressing. Increase press time by 2-3 seconds for each additional layer to ensure adhesion. Allow each layer to cool slightly before adding the next to avoid overheating the vinyl. Use thermal tape to secure complex designs and prevent shifting during pressing. For intricate designs, consider layering in small sections to maintain precision. Always test the design on scrap fabric first to ensure proper alignment and color consistency. This method ensures vibrant, professional-looking multi-color logos on hoodies.
Tools and Equipment for Precise Placement
The heat press, craft cutter, and weeding tools are essential for precise HTV placement. Thermal tape secures designs, while measuring tapes and alignment grids ensure accuracy and symmetry.
Heat Press: Choosing the Right Size and Type
Selecting the correct heat press is crucial for precise HTV placement. Common sizes include small (12×10 inches), medium (15×15 inches), and large (16×20 inches), each suitable for different hoodie areas. A clamshell press is ideal for small designs, while a swing-away press offers better access for larger or complex placements. Automatic presses with digital controls provide consistent pressure and temperature, ensuring professional results. Consider the hoodie’s thickness and design size when choosing. A heat press with even heating and adjustable pressure is essential for applying HTV effectively. Always consult the manufacturer’s guidelines for optimal performance and durability of the press. The right size and type ensure accurate and long-lasting logo placement on hoodies.
Cutting Tools: Craft Cutters and Weeding Tools
Craft cutters, such as Cricut or Silhouette machines, are essential for precision-cutting heat transfer vinyl into intricate designs. These tools ensure clean edges and accurate shapes, minimizing waste. For smaller details, handheld cutters or craft knives can be used for manual adjustments. Weeding tools, like weeding picks or scrapers, are vital for removing excess vinyl from intricate designs without damaging the desired artwork. A good-quality cutter blade is crucial for sharp cuts, while a weeding tool helps in carefully lifting and removing unwanted vinyl fragments. Regular maintenance, such as replacing dull blades, ensures optimal performance. These tools are indispensable for achieving professional-looking designs and smooth transitions during the application process. Proper use of cutting and weeding tools guarantees crisp, detailed logos on hoodies.
Thermal Tape: Securing the Design for Application
Thermal tape is a must-have tool for securing heat transfer vinyl designs during application. It ensures the vinyl stays perfectly aligned on the hoodie, preventing movement or shifting under the heat press. Available in paper-based or silicone-coated options, thermal tape adheres lightly to fabrics without leaving residue. To use, place the tape over the vinyl design, smoothing it firmly to secure all edges; This step is especially crucial for intricate or multi-layer designs. Always pre-test the tape on a small fabric area to ensure compatibility. Proper use of thermal tape guarantees a professional finish, minimizing the risk of bubbles or misalignment. It’s an essential step for achieving crisp, long-lasting logos on hoodies. Regularly clean and replace the tape to maintain its adhesive properties for consistent results.

Troubleshooting Common Placement Issues
Address peeling or bubbling by reapplying heat or adjusting press time. Correct crooked logos by realigning design before pressing. Ensure symmetry for a polished finish.
Fixing Peeling or Bubbling Vinyl
Peeling or bubbling vinyl can occur due to insufficient heat or pressure during application. To fix this, reapply heat using your heat press at the recommended temperature (typically 300°F ⎯ 320°F) for 10-15 seconds. Ensure even pressure across the design. If bubbles persist, carefully lift the edge of the vinyl and smooth it out while reapplied heat. For minor peeling, use a household iron with a heat-resistant cloth. Avoid using steam, as it can damage the vinyl. Prevent future issues by ensuring proper weeding of excess vinyl and cleaning the fabric surface before application. Thermal tape can also help secure the design during pressing, reducing movement and ensuring a flawless finish.
Correcting Crooked or Misaligned Logos
If your logo appears crooked or misaligned, start by carefully inspecting the placement before pressing. Use a ruler or measuring tape to ensure symmetry and proper alignment with the garment’s seams or centerline. For minor adjustments, peel off the carrier sheet and reposition the vinyl slightly, smoothing out any air bubbles with a heat-resistant tool. For larger misalignments, consider removing the vinyl completely and reapplying it using thermal tape to secure it in place. Always double-check your design’s orientation and placement before pressing to avoid costly mistakes. A well-aligned logo enhances professionalism, so take the time to get it right!

Additional Resources for Hoodie Logo Placement
Explore printable HTV placement charts, online tutorials, and video guides for precise hoodie logo placement. These resources offer detailed measurements and visual aids to ensure professional results.
Printable HTV Placement Charts and Guides
Printable HTV Placement Charts and Guides
Printable HTV placement charts are invaluable tools for achieving precise logo positioning on hoodies. These guides provide detailed measurements and visual aids to ensure symmetry and proper alignment. They often include templates for various hoodie areas, such as the front chest, back, sleeves, and hood. By using these charts, you can measure and mark placement points accurately, avoiding common mistakes like crooked designs. Many charts also offer size guidelines, helping you scale logos appropriately for different placement locations. Additionally, they frequently include tips for multi-color designs and layering. These resources are particularly useful for beginners, offering a clear roadmap to professional-looking results. Printable guides are widely available online, making it easy to customize hoodies with confidence and precision.
Online Tutorials and Video Demonstrations
Online tutorials and video demonstrations are excellent resources for mastering heat transfer vinyl hoodie logo placement. These visual guides provide step-by-step instructions, covering everything from preparation to application. Videos often include tips for aligning designs, using heat presses, and troubleshooting common issues. Many tutorials focus on specific techniques, such as layering multi-color designs or achieving crisp lines on fabric. Platforms like YouTube and Pinterest offer a wealth of free content, while some websites provide in-depth paid courses. These resources are particularly helpful for beginners, as they demonstrate how to properly measure, cut, and press vinyl for various hoodie areas. By following along with these guides, you can improve your skills and achieve professional-looking results. They are a valuable complement to printable charts and written instructions, offering a hands-on learning experience.
Mastering heat transfer vinyl hoodie logo placement requires attention to symmetry, alignment, and proper tools. Practice and experimentation are key to achieving professional, long-lasting results. Happy crafting!
Final Tips for Achieving Professional Results
To ensure professional results with heat transfer vinyl on hoodies, always align designs vertically or horizontally for readability. Avoid placing logos along pant lines or uneven surfaces. Use thermal tape to secure the vinyl during application. Pre-wash hoodies to remove any finish that might interfere with adhesion. Measure carefully and use a heat press chart for optimal temperature and time settings. For multi-color designs, layer carefully and allow each layer to cool before adding the next. Practice on scrap fabric to fine-tune your technique. Symmetry is key, so double-check placement before pressing. Finally, test different vinyl types on various fabrics to ensure durability and visibility. Happy crafting!