
Welcome to the 3 Pin Flasher Relay Wiring Diagram Manual, your essential guide for understanding and installing flasher relays in automotive systems. This manual provides detailed diagrams, step-by-step instructions, and troubleshooting tips to ensure safe and proper wiring. Whether you’re a professional technician or a DIY enthusiast, this resource will help you master the installation process.
1.1 Overview of the 3 Pin Flasher Relay
The 3 Pin Flasher Relay is a crucial component in automotive electrical systems, primarily used for controlling turn signals and hazard lights. It operates by interrupting the electrical circuit at a specified rate, creating the flashing effect required for safety indicators. The relay consists of three pins: one for the power supply, one for the ground connection, and one for the load (such as the turn signal lights). Proper wiring is essential to ensure the relay functions correctly and safely. Improper wiring can lead to malfunctioning lights, electrical issues, or even safety hazards. This manual provides a comprehensive guide to understanding and wiring the 3 Pin Flasher Relay effectively.
1.2 Importance of Proper Wiring
Proper wiring is critical for the safe and reliable operation of a 3-pin flasher relay. Incorrect connections can lead to electrical hazards, such as short circuits or component damage. Improper wiring may cause the relay to malfunction, resulting in turn signals or hazard lights not functioning correctly. This can compromise road safety and lead to legal issues. Additionally, faulty wiring can cause intermittent operation, making diagnosis difficult. Ensuring all connections are clean, secure, and match the diagram prevents such issues. Proper wiring also extends the lifespan of the relay and associated components. Always follow the manual’s guidelines to avoid potential risks and ensure consistent performance. Attention to detail is key for both safety and functionality.

Understanding the Components of the 3 Pin Flasher Relay
The 3-pin flasher relay consists of an electromagnetic coil, metal contacts, and a resistor. Pins 1 and 2 are inputs, while pin 3 is the output terminal;
2.1 Pin Configuration and Functions
A standard 3-pin flasher relay typically features three terminals: power supply (pin 1), load (pin 2), and ground (pin 3). Pin 1 connects to the vehicle’s power source, often through a fuse or switch. Pin 2 links to the load, such as turn signal or hazard lights, while pin 3 provides the ground connection. This configuration allows the relay to control the power flow to the connected circuit. Proper wiring ensures the relay functions correctly, preventing issues like intermittent flashing or complete circuit failure. Understanding each pin’s role is crucial for safe and effective installation. Always refer to the wiring diagram for specific configurations, as variations may exist depending on the vehicle or application.
2.2 Internal Circuitry of the Relay
The internal circuitry of a 3-pin flasher relay consists of an electromagnetic coil, a moveable armature, and fixed contacts. When power is applied to the coil, it generates a magnetic field, pulling the armature to close the contacts and complete the circuit. This allows current to flow to the connected load, such as turn signals or hazard lights. The relay also includes a resistor to protect against voltage spikes when the coil is deactivated. Understanding this internal operation is crucial for diagnosing faults and ensuring proper wiring connections.

Step-by-Step Wiring Diagram Guide
Follow this guide to connect the 3-pin flasher relay safely and effectively. Start with the power supply, ensure proper grounding, and finish with load connections for reliable operation.
3.1 Connecting the Power Supply
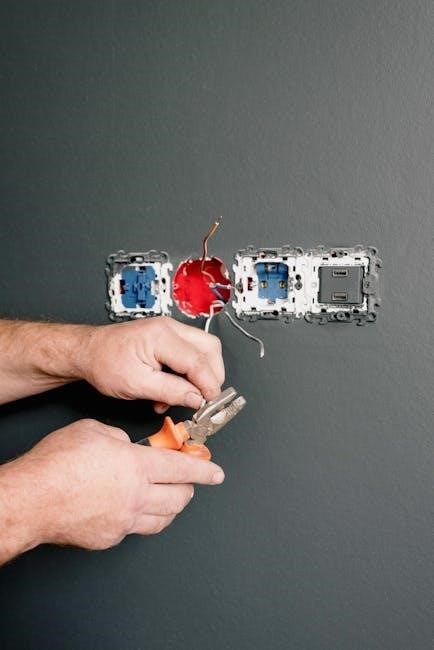
To connect the power supply for the 3-pin flasher relay, locate the positive terminal of your vehicle’s battery or an appropriate power source. Use a fused wire harness to ensure circuit protection. Identify the relay’s power pin, typically marked as pin 30 or 86, depending on the model. Connect the positive wire to this pin, ensuring a secure and clean connection. Avoid using damaged wires or loose connectors, as they can cause malfunctions. Double-check the wiring diagram to confirm the correct pin configuration. Once connected, verify the circuit by turning on the ignition and testing the relay’s operation. Always use proper insulation and secure the wires to prevent damage or short circuits.
3.2 Grounding the Relay
Proper grounding is essential for the 3 Pin Flasher Relay to function correctly. Locate the ground terminal, typically marked as pin 2 or pin 3, depending on the relay’s configuration. Connect this pin to a clean, bare metal surface on the vehicle’s chassis or frame using a short, heavy-gauge wire. Ensure the connection is secure and free from corrosion or rust. A poor ground can cause intermittent flashing or complete failure of the relay. Avoid using painted or insulated surfaces, as this will compromise the ground connection. Double-check the wiring diagram to confirm the correct ground pin for your specific relay model. Proper grounding ensures reliable operation of your turn signals or hazard lights.
3.3 Connecting the Load (Turn Signal or Hazard Lights)
To connect the load, identify the output pin on the 3-pin flasher relay, typically labeled as pin 87. This pin supplies power to the turn signal or hazard lights. Use a suitable connector or wire to link the load directly to pin 87. Ensure the wiring harness is securely attached to prevent loose connections. For dual-function setups, verify that the relay can handle both turn signal and hazard light operations simultaneously. Always test the circuit after connection to confirm proper functionality. Refer to your vehicle’s wiring diagram for specific load requirements and ensure all connections are insulated to avoid short circuits.

Common Wiring Configurations
This section explores standard configurations, such as turn signal and hazard light setups, ensuring proper relay operation. Dual-function setups are also covered for enhanced versatility.
4.1 Standard Turn Signal Setup
In a standard turn signal setup, the 3-pin flasher relay is connected to manage the turn signal lights. Pin 1 typically connects to the power supply (usually via the vehicle’s fuse box), while pin 2 links to the turn signal lights through a switch. Pin 3 is grounded to complete the circuit. The relay acts as an intermediary, allowing the turn signal switch to control the lights without directly handling high current. Proper wiring ensures smooth operation, with the relay pulsing power to indicate turning direction. Always consult the vehicle’s wiring diagram to confirm connections, as configurations may vary. This setup is essential for safe and reliable turn signal functionality.
4.2 Hazard Light Configuration
The hazard light configuration using a 3-pin flasher relay involves connecting the relay to your vehicle’s electrical system to control the hazard lights. Pin 1 is typically connected to the power source, Pin 2 to the hazard light switch, and Pin 3 to the load (hazard lights). Ensure the relay is properly grounded to avoid malfunctions. Connect the power supply to Pin 1, the hazard switch to Pin 2, and the lights to Pin 3. This setup allows the relay to act as a switch, activating the hazard lights when the switch is engaged. Always refer to your vehicle’s wiring diagram for specific connections. Proper wiring ensures safe and reliable operation of your hazard lights.
4.3 Dual-Function Setup (Turn Signal and Hazard Lights)
In a dual-function setup, the 3 Pin Flasher Relay is configured to control both turn signals and hazard lights. The relay must be wired to handle two separate circuits: one for individual turn signals and another for hazard lights. This setup typically requires connecting the relay to both the turn signal switch and the hazard light switch. The wiring harness should be organized to prevent interference and ensure proper function. Testing each circuit separately is crucial to verify that turn signals operate independently and hazard lights function collectively. Ensure the relay specifications meet the combined load requirements to avoid malfunctions. Proper wiring and testing are essential for reliable operation.
Troubleshooting Common Issues
Identify issues like intermittent flashing or non-functioning lights. Check for dirty connector pins or bad crimps. Inspect wiring for shorts or open circuits and ensure clean, secure connections.
5.1 Identifying Faulty Wiring
Identifying faulty wiring in a 3-pin flasher relay system requires careful inspection and testing. Start by visually inspecting the wires and connectors for signs of damage, corrosion, or dirt. Use a multimeter to check for continuity and resistance between the pins. A short circuit or open connection can indicate faulty wiring. If the flasher relay fails to operate, test the power supply and ground connections first. Dirty or corroded connector pins can disrupt the circuit, so clean them with a soft brush or electrical cleaner. Additionally, check for loose connections or improper crimps, as these can cause intermittent issues. Always refer to the wiring diagram to ensure connections match the manufacturer’s specifications.
5.2 Diagnosing Relay Malfunctions
Diagnosing malfunctions in a 3-pin flasher relay involves a systematic approach. Start by checking the relay’s pins for dirt or corrosion, as this can disrupt connectivity. Use a multimeter to test for continuity and identify any open or shorted circuits. If Driver 3 (pin 4) is malfunctioning, verify its resistance and ensure it operates within specifications. Inspect the wiring harness for damaged or loose connections, addressing any bad crimps or faults. After repairs, cycle the driver to reset the circuit and confirm proper function. Regular maintenance, such as cleaning connectors and inspecting wiring, can prevent future issues. Always refer to the wiring diagram for accurate troubleshooting.
5.3 Solving Intermittent Flashing Problems
Intermittent flashing issues in a 3-pin flasher relay setup can be frustrating but are often due to minor wiring or connection faults. Start by inspecting the connector pins for dirt or corrosion, as dirty contacts can disrupt the signal. Clean the pins with a soft brush or electrical cleaner. Next, check for loose connections or damaged wires, which can cause intermittent operation. Verify that the ground wire is securely attached, as a poor ground is a common cause of irregular flashing. If the issue persists, test the relay by swapping it with a known working unit. Finally, ensure the load (e.g., turn signal bulbs) is within the relay’s rated capacity to avoid overheating or malfunction.
Safety Precautions and Best Practices
Always disconnect the battery before wiring to prevent short circuits. Use insulated tools and ensure proper grounding to avoid electrical shocks. Follow manufacturer guidelines strictly.
6.1 Working with Electrical Systems Safely
When working with electrical systems, especially involving a 3-pin flasher relay, safety is paramount. Always disconnect the power source before starting to prevent live wire hazards. Use insulated tools to handle wires and components to avoid electric shocks. Ensure proper grounding to safeguard against unexpected current paths. Never work near open flames or sparks, and keep a fire extinguisher handy. Maintain a clean, dry workspace to prevent electrical accidents. Avoid overloading circuits and ensure all connections are secure to prevent short circuits. After completing the wiring, use a multimeter to test for any shorts or open circuits. Properly insulate all wires and connections to maintain long-term reliability and safety.
6.2 Avoiding Short Circuits
Avoiding short circuits is crucial when working with a 3-pin flasher relay to prevent damage to the electrical system. Ensure all wires are properly insulated and securely connected to avoid unintended contact. Regularly inspect wiring for signs of wear, fraying, or corrosion, and repair or replace damaged sections promptly. Use the correct gauge of wire for the application to handle the current load without overheating. Never overload the circuit, as this can lead to short circuits. Additionally, always disconnect the power supply before making any modifications. Consider using a relay with built-in short-circuit protection for added safety. If unsure, consult a professional to ensure proper installation and avoid potential hazards.
Maintenance and Upkeep
Regular maintenance ensures reliability. Clean connector pins, inspect wiring for damage, and replace worn parts to prevent issues and ensure optimal performance.
7.1 Cleaning Connector Pins
Cleaning connector pins is crucial for maintaining reliable electrical connections. Over time, dirt, corrosion, or oxidation can build up, causing poor conductivity. To clean the pins, use a soft-bristle brush or a cotton swab dipped in isopropyl alcohol. Gently scrub the surface to remove any debris or corrosion. Avoid using harsh chemicals or abrasive materials that might damage the pins. After cleaning, ensure the pins are completely dry before reconnecting them to the circuit. Regular maintenance helps prevent faulty connections and ensures optimal performance of your 3-pin flasher relay system. Always handle electrical components with care to avoid damage or short circuits.
7.2 Inspecting Wiring for Damage
Regularly inspecting the wiring for damage is crucial to ensure the reliability of your 3 pin flasher relay system. Start by visually examining the wires for signs of wear, such as fraying, cuts, or burn marks. Check connectors for corrosion or dirt buildup, as these can disrupt the electrical connection. Use a multimeter to test for continuity and identify any open circuits or short circuits. Additionally, look for loose connections or bad crimps, which can cause intermittent issues. If any damage is found, repair or replace the affected components immediately to prevent further malfunctions. This proactive approach will help maintain optimal performance and safety in your wiring setup.
Thank you for choosing this manual. Proper installation and maintenance ensure reliable operation. Apply the knowledge gained to achieve optimal performance and safety in your electrical projects.
8.1 Summary of Key Points
8.2 Final Tips for Successful Installation
To ensure a seamless installation, always double-check your connections against the wiring diagram. Use high-quality tools and materials to prevent wear and tear. Test the circuit with a multimeter before connecting the battery to avoid damage. Inspect all wires for signs of damage or fraying and replace them if necessary. Follow safety guidelines to prevent electrical shocks or short circuits. Regularly maintain your wiring and relay to ensure optimal performance. By adhering to these tips, you can achieve a reliable and long-lasting installation. Keep this manual handy for future reference and troubleshooting.